
Advertisement
The Ultimate Guide to Making Refrigerator Dill Pickles at Home
If you love pickles, then you’re in for a treat! Making Refrigerator Dill Pickles at home is incredibly easy, and the result is far superior to anything you’ll find at the grocery store. These homemade pickles are crisp, tangy, and packed with fresh garlic and dill flavor—all without the need for complicated canning techniques.
In this comprehensive guide, we’ll walk you through everything you need to know about making Refrigerator Dill Pickles, including:
-
Why Refrigerator Dill Pickles Are Better Than Store-Bought
-
Step-by-Step Recipe for Perfect Homemade Pickles
-
Best Types of Cucumbers for Pickling
-
Customizing Your Pickles with Different Spices
-
How Long They Last & Storage Tips
-
Frequently Asked Questions
By the end of this post, you’ll be a Refrigerator Dill Pickles expert, ready to make batch after batch of crunchy, flavorful pickles right in your own kitchen.
Why Make Refrigerator Dill Pickles?
Store-bought pickles are convenient, but they often contain preservatives and artificial flavors. When you make Refrigerator Dill Pickles at home, you control exactly what goes into them—no unnecessary additives, just fresh, wholesome ingredients.
Benefits of Refrigerator Pickles:
✅ No Canning Required – Unlike traditional canned pickles, refrigerator pickles don’t require a boiling water bath or special equipment.
✅ Faster & Easier – They’re ready to eat in just 24 hours!
✅ Crispier Texture – Since they’re not heat-processed, they stay extra crunchy.
✅ Customizable Flavor – Adjust the garlic, dill, and spices to your liking.
If you’ve never tried making homemade Refrigerator Dill Pickles, now is the perfect time to start!
Refrigerator Dill Pickles Recipe
This foolproof recipe yields crisp, tangy pickles with the perfect balance of garlic and dill.
Ingredients
-
3 cups water
-
¾ cup white vinegar
-
3 tbsp granulated sugar
-
2 tbsp kosher salt
-
6 small cucumbers (pickling or Persian cucumbers work best)
-
8 sprigs fresh dill
-
4 cloves garlic, peeled and sliced thin
-
2 tbsp pickling spice
Equipment Needed
-
2 (1-quart) wide-mouth jars with lids
-
Medium saucepan
-
Knife & cutting board
Step-by-Step Instructions
1. Prepare the Brine
In a medium saucepan, combine:
-
3 cups water
-
¾ cup white vinegar
-
3 tbsp sugar
-
2 tbsp kosher salt
Bring the mixture to a boil over medium-high heat, then reduce to low and simmer for 15 minutes. Remove from heat and let it cool slightly.
2. Prep the Cucumbers
Wash the cucumbers thoroughly. You can leave them whole, slice them into spears, or cut them into chips—whatever you prefer! If they’re too tall for your jars, trim the ends so they fit snugly.
3. Layer the Jars
Divide the following between two jars:
-
Cucumber spears
-
Fresh dill sprigs (tucked between cucumbers)
-
Sliced garlic cloves
-
Pickling spice
4. Pour in the Brine
Carefully pour the warm brine over the cucumbers, ensuring they’re fully submerged.
5. Seal & Refrigerate
Secure the lids and refrigerate for at least 24 hours before eating. The longer they sit, the more flavorful they become!
6. Enjoy!
Your Refrigerator Dill Pickles will stay fresh for up to 1 month in the fridge.
Best Cucumbers for Refrigerator Dill Pickles
Not all cucumbers are created equal when it comes to pickling. For the crispiest results, use:
✔ Pickling Cucumbers – Short, firm, and bumpy, these are ideal for pickles.
✔ Persian Cucumbers – Smaller and thin-skinned, great for quick pickles.
✔ Kirby Cucumbers – A popular choice for their crunch.
Avoid regular salad cucumbers (like English cucumbers) as they tend to get mushy.
Customizing Your Refrigerator Dill Pickles
One of the best things about homemade pickles is that you can tweak the flavors to your liking. Here are some fun variations:
Spicy Refrigerator Dill Pickles
🌶 Add 1-2 sliced jalapeños or ½ tsp red pepper flakes for heat.
Garlic Lover’s Pickles
🧄 Increase the garlic to 6-8 cloves for an extra punch.
Sweet & Tangy Pickles
🍯 Replace 1 tbsp sugar with honey for a deeper sweetness.
Extra Herb-Infused Pickles
🌿 Add mustard seeds, coriander seeds, or bay leaves for more complexity.
Why Refrigerator Dill Pickles Are Better Than Store-Bought
If you’ve ever compared homemade Refrigerator Dill Pickles to store-bought versions, you know there’s no contest. The crisp texture, bold garlic flavor, and fresh dill aroma make homemade pickles far superior. But what exactly sets them apart? Let’s dive into the reasons why making your own Refrigerator Dill Pickles is the best choice for pickle lovers.
1. No Artificial Preservatives or Additives
Store-bought pickles often contain:
-
Sodium benzoate (a common preservative)
-
Yellow food coloring (to enhance appearance)
-
Artificial flavors (to mimic fresh ingredients)
When you make Refrigerator Dill Pickles at home, you control every ingredient. You use real garlic, fresh dill, and natural spices, ensuring a cleaner, healthier snack.
2. Superior Crunch & Texture
One of the biggest complaints about commercial pickles is that they can be mushy or rubbery. This happens because:
-
Mass-produced pickles are often pasteurized (heated to kill bacteria), which softens them.
-
They sit on shelves for months, losing their crispness over time.
Refrigerator Dill Pickles, on the other hand, are never heat-processed. The cold brine keeps them crisp and crunchy for weeks.
Pro Tip for Extra Crunch:
Add 1 grape leaf or ½ tsp black tea leaves to each jar—the natural tannins help maintain firmness!
3. Customizable Flavor
Store-bought pickles come in limited varieties (usually just “dill” or “bread & butter”). But when you make Refrigerator Dill Pickles, you can adjust:
-
Garlic intensity (add more or less cloves)
-
Spice level (throw in jalapeños or red pepper flakes)
-
Sweetness (adjust sugar or try honey)
-
Herb variations (add mustard seeds, coriander, or bay leaves)
This flexibility means you can create your perfect pickle every time.
4. Quick & Easy Process (No Canning Needed!)
Traditional canning requires:
-
Sterilizing jars
-
Boiling water baths
-
Precise processing times
Refrigerator Dill Pickles skip all that. You simply:
-
Make the brine.
-
Pack the jars.
-
Refrigerate.
No special equipment, no fuss—just ready-to-eat pickles in 24 hours.
5. Cost-Effective & Less Waste
A jar of gourmet pickles can cost 5−10, but homemade Refrigerator Dill Pickles cost just pennies per serving. Plus, you can reuse glass jars, reducing waste.
Bottom Line:
If you love pickles but hate artificial ingredients, mushy texture, and limited flavors, Refrigerator Dill Pickles are the solution. They’re fresher, crispier, and fully customizable—making them the clear winner over store-bought versions.
The Best Cucumbers for Refrigerator Dill Pickles
Not all cucumbers work well for pickling. Choosing the right type ensures your Refrigerator Dill Pickles turn out crisp, flavorful, and not mushy. Here’s a breakdown of the best (and worst) cucumbers to use, plus tips for selecting the freshest ones.
1. Pickling Cucumbers (Kirby Cucumbers)
Best for: Classic crunchy dill pickles
Why they’re great:
-
Short and firm (ideal for fitting in jars)
-
Bumpy skin (holds up well in brine)
-
Fewer seeds (prevents sogginess)
Where to find them: Farmers’ markets or grocery stores (often sold in bulk during summer).
2. Persian Cucumbers
Best for: Quick pickles & snacking
Why they’re great:
-
Thin skin (no peeling needed)
-
Mild, sweet flavor
-
Small size (fits easily in jars)
Tip: Since they’re less sturdy than Kirby cucumbers, eat them within 2 weeks for best texture.
3. Mini Cucumbers
Best for: Single-serve pickles
Why they’re great:
-
Naturally crisp
-
Seedless varieties available
-
Perfect for whole pickles
Cucumbers to Avoid
❌ English Cucumbers – Too watery, become mushy.
❌ Overripe Cucumbers – Soft texture, large seeds.
❌ Waxed Cucumbers (common in supermarkets) – The wax coating prevents brine absorption.
How to Pick the Freshest Cucumbers
-
Look for firmness (no soft spots).
-
Check the ends (shouldn’t be shriveled).
-
Smaller = crisper (large cucumbers tend to be seedy).
Storage Tip:
Keep cucumbers unwashed in the fridge until ready to use. If they’re limp, soak in ice water for 30 minutes to revive crispness.
What If You Can’t Find Pickling Cucumbers?
You can still make Refrigerator Dill Pickles with:
✔ Garden cucumbers (remove seeds if too large).
✔ Zucchini (for a unique twist).
✔ Green beans or carrots (for non-cucumber pickles).
Final Thought:
The right cucumber makes all the difference. For the crunchiest, most authentic Refrigerator Dill Pickles, stick to Kirby or Persian cucumbers whenever possible.
How to Customize Your Refrigerator Dill Pickles
One of the best things about homemade Refrigerator Dill Pickles is how easy they are to customize. Whether you like them spicy, extra garlicky, or sweet, here’s how to tweak the recipe to match your taste.
1. Spicy Dill Pickles
🌶 Add:
-
2-3 sliced jalapeños (for medium heat).
-
1 tsp red pepper flakes (for intense spice).
-
1 habanero pepper (for extreme heat lovers).
Perfect for: Bloody Mary garnishes or snacking with cheese.
2. Garlic Lover’s Pickles
🧄 Boost the garlic by:
-
Doubling the cloves (8-10 instead of 4).
-
Using roasted garlic for a mellower, deeper flavor.
-
Adding garlic scapes in spring for a fresh twist.
3. Sweet & Tangy Pickles
🍯 Adjust the sweetness with:
-
Replace sugar with honey (1:1 ratio).
-
Add a cinnamon stick for warmth.
-
Toss in ½ cup sliced onions for extra flavor.
4. Herb-Infused Variations
🌿 Experiment with:
-
Mustard seeds (1 tsp for a peppery kick).
-
Dill seeds (instead of fresh dill for stronger flavor).
-
Bay leaves or coriander seeds (for complexity).
5. Low-Sodium Pickles
🧂 Reduce salt by:
-
Using 1 tbsp salt instead of 2.
-
Adding more vinegar (1 cup) to compensate.
-
Including citrus zest (lemon or lime) for brightness.
Bonus: Pickling Other Vegetables
Your brine isn’t just for cucumbers! Try:
-
Carrots (cut into sticks).
-
Green beans (great for bloody marys).
-
Radishes (adds a peppery crunch).
Pro Tip:
Label jars with the date and flavor variations so you can remember your favorites!
How Long Do Refrigerator Dill Pickles Last?
When stored properly in an airtight jar, these pickles will stay fresh for up to 1 month. Always use clean utensils when serving to prevent contamination.
Signs Your Pickles Have Gone Bad
-
Cloudy brine (unless you used garlic, which can cause cloudiness)
-
Slimy or mushy texture
-
Off smell
If in doubt, toss them out!
Frequently Asked Questions (FAQs)
Can I Use Apple Cider Vinegar Instead of White Vinegar?
Yes! Apple cider vinegar adds a slightly fruity flavor, but white vinegar keeps the classic dill pickle taste.
Why Are My Pickles Soft?
This can happen if:
-
The cucumbers weren’t fresh.
-
The brine wasn’t hot enough when poured.
-
They were stored too long.
For extra crunch, add grape leaves or black tea leaves (they contain tannins that help maintain firmness).
Can I Reuse the Brine?
You can reuse it once for a second batch, but the flavor will be weaker.
Do I Have to Refrigerate Them Immediately?
Yes! Unlike canned pickles, refrigerator pickles must stay chilled to stay safe.
The Ultimate Guide to Making Refrigerator Dill Pickles at Home
Advertisement
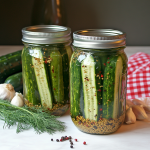
My grandmother always kept a jar of crunchy dill pickles in the fridge, and opening that lid felt like opening a jar full of summer memories. These pickles take just 10 minutes to prepare and they taste better with each passing day. A great way to enjoy your garden cucumbers or store-bought ones! Give it a try — your fridge (and your taste buds) will thank you.
- Prep Time: 10 minutes
- Total Time: 10 minutes
Ingredients
-
4–5 small cucumbers (Kirby or Persian are perfect)
-
2 cups water
-
1 cup white vinegar
-
1 tbsp sugar
-
1 tbsp salt (non-iodized preferred)
-
4 garlic cloves, smashed
-
1 tsp black peppercorns
-
1 tsp mustard seeds (optional)
-
A few sprigs fresh dill
-
Optional: pinch of red pepper flakes for a kick
Instructions
-
Wash and slice cucumbers into spears or rounds.
-
Pack them tightly into a clean mason jar with garlic, dill, peppercorns, and optional spices.
-
In a pot, combine water, vinegar, sugar, and salt. Heat until salt and sugar dissolve.
-
Pour the warm brine into the jar, covering the cucumbers completely.
-
Let cool to room temperature, then refrigerate.
-
Wait 24 hours before enjoying — but 3 days gives the best flavor
Notes
-
Use very fresh cucumbers for the crunchiest pickles.
-
Don’t boil the cucumbers — hot brine only!
-
These will last up to 1 month in the fridge, but they’re usually gone long before that.
Nutrition
- Calories: 5 kcal per serving
- Sodium: 300mg
- Fat: 0g
- Carbohydrates: 1g
- Protein: 0g
Final Thoughts
Making Refrigerator Dill Pickles at home is a game-changer. They’re easy, customizable, and taste infinitely better than store-bought versions. Whether you like them garlicky, spicy, or extra tangy, this recipe is foolproof.