Advertisement
Easter Bunny Button Cookies: A Delightful Easter Treat
Easter is a time for celebration, family gatherings, and, of course, delicious treats! If you’re looking for a fun and festive recipe to add to your Easter menu, look no further than Easter Bunny Button Cookies. These miniature, one-bite cookies are not only adorable but also incredibly easy to make. With pastel candy centers, they are the perfect addition to your Easter dessert table or a thoughtful homemade gift for friends and family. In this post, we’ll walk you through the step-by-step process of making these delightful cookies, along with tips, variations, and why they’re a must-try this Easter season.
Why You’ll Love Easter Bunny Button Cookies
Easter Bunny Button Cookies are more than just a sweet treat—they’re a festive experience! Here’s why they’re a hit:
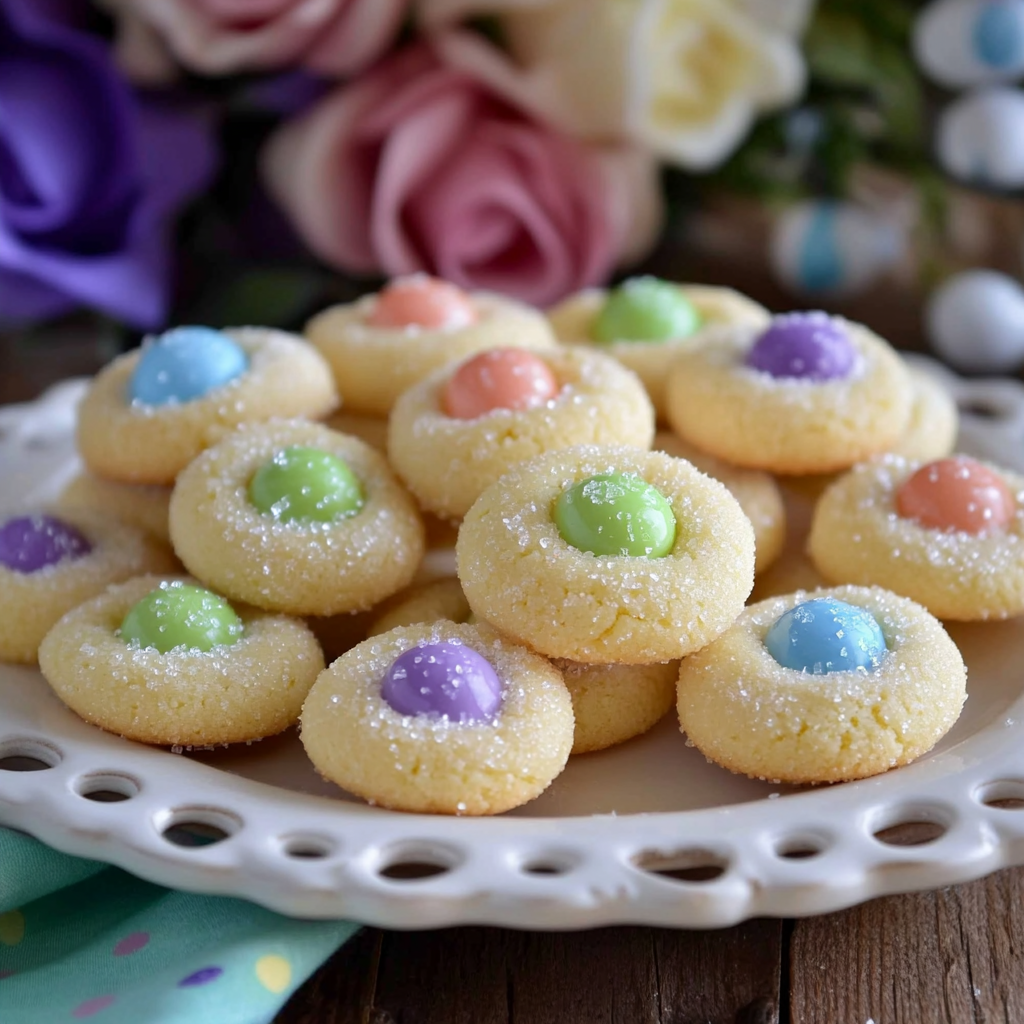
- Adorable and Festive: The pastel-colored M&M candies in the center of each cookie make them look like tiny Easter eggs or bunny buttons, perfect for the holiday.
- Quick and Easy: With a total time of just 25 minutes, these cookies are a breeze to whip up, even if you’re short on time.
- Versatile: These cookies can be customized with different candy colors or flavors to suit your preferences.
- Perfect for Gifting: Pack them in a cute Easter-themed box or bag, and you’ve got a thoughtful homemade gift that everyone will love.
Ingredients for Easter Bunny Button Cookies
Before we dive into the instructions, let’s gather all the ingredients you’ll need to make these delightful cookies. The recipe yields 48 cookies, making it perfect for sharing (or keeping all to yourself!).
Ingredients:
- 1 cup butter, softened: Unsalted butter works best for controlling the saltiness of the cookies.
- 2/3 cup sugar: Granulated sugar adds the perfect amount of sweetness.
- 2 large egg yolks: Egg yolks help bind the dough and add richness.
- 1 teaspoon vanilla extract: A touch of vanilla enhances the flavor.
- 2 1/3 cups all-purpose flour: The base of the cookie dough.
- 1/2 cup sanding sugar: This coarse sugar adds a delightful crunch and sparkle to the cookies.
- 1/2 cup chocolate M&M candy: Use pastel-colored M&Ms for that Easter vibe.
Step-by-Step Instructions for Easter Bunny Button Cookies
Now that you have all your ingredients ready, let’s get baking! Follow these simple steps to create your own batch of Easter Bunny Button Cookies.
Step 1: Preheat the Oven
Start by preheating your oven to 350°F (175°C). This ensures that your oven is at the right temperature when you’re ready to bake. Line a baking sheet with parchment paper or a silicone baking mat to prevent the cookies from sticking.
Step 2: Cream the Butter and Sugar
In a mixing bowl, use a hand-held mixer to beat together the softened butter and sugar until the mixture is light and fluffy. This step is crucial for creating a soft and tender cookie texture.
Step 3: Add Egg Yolks and Vanilla
Next, add the egg yolks and vanilla extract to the butter-sugar mixture. Beat until everything is well combined. The egg yolks add richness, while the vanilla enhances the overall flavor.
Step 4: Incorporate the Flour
Gradually add the all-purpose flour to the mixture. Mix until just combined—be careful not to overmix, as this can result in tough cookies. The dough should be soft and pliable.
Step 5: Shape the Cookies
Using a teaspoon, portion out the dough and roll it into small balls. Each ball should be about the size of a teaspoon. Roll each ball in sanding sugar to coat it evenly. The sanding sugar not only adds a sweet crunch but also gives the cookies a festive sparkle.
Step 6: Add the M&M Centers
Place the sugar-coated dough balls onto the prepared baking sheet. Gently press a pastel M&M candy into the center of each ball. The M&M will act as the “button” in your Easter Bunny Button Cookies.
Step 7: Bake the Cookies
Bake the cookies in the preheated oven for 10 minutes. Keep an eye on them to ensure they don’t overbake. The cookies should be lightly golden around the edges but still soft in the center.
Step 8: Cool and Serve
Once baked, remove the cookies from the oven and let them cool on the baking sheet for 3-5 minutes. This allows them to set slightly. Then, transfer the cookies to a wire cooling rack to cool completely. Serve and enjoy!
The History and Significance of Easter Treats
Easter is a holiday rich in tradition, and one of the most beloved aspects of this celebration is the food. From hot cross buns to chocolate eggs, Easter treats have a long history that dates back centuries. The tradition of baking sweet treats for Easter can be traced to early Christian practices, where fasting during Lent was followed by a feast of rich, indulgent foods. Over time, these feasts evolved to include a variety of baked goods, many of which are still enjoyed today.
One of the most iconic Easter treats is the Easter egg, which symbolizes new life and rebirth. While chocolate eggs are a modern favorite, the tradition of decorating eggs goes back to ancient times. In many cultures, eggs were dyed and given as gifts to celebrate the arrival of spring. This tradition was later adopted by Christians, who saw the egg as a symbol of the resurrection of Jesus Christ.
Another popular Easter treat is the hot cross bun, a spiced sweet bun marked with a cross on top. These buns have been associated with Good Friday since the 12th century, and the cross is said to represent the crucifixion of Jesus. In some cultures, hot cross buns are believed to have magical properties, such as protecting against evil spirits or ensuring that bread baked throughout the year will turn out perfectly.
Easter Bunny Button Cookies are a modern addition to this rich tradition of Easter treats. These adorable cookies, with their pastel candy centers, capture the joy and whimsy of the holiday. They are a fun and festive way to celebrate Easter, whether you’re baking them for a family gathering, an Easter egg hunt, or as a thoughtful homemade gift. By incorporating these cookies into your Easter celebrations, you’re continuing a long-standing tradition of sharing sweet treats with loved ones during this special time of year.
Tips for Baking Perfect Easter Bunny Button Cookies
Baking is both an art and a science, and achieving the perfect batch of Easter Bunny Button Cookies requires a bit of know-how. Here are some tips to ensure your cookies turn out just right:
- Use Quality Ingredients: The quality of your ingredients can make a big difference in the final product. Use fresh, high-quality butter, eggs, and flour for the best results. If possible, opt for organic or locally sourced ingredients.
- Measure Accurately: Baking is a precise science, so it’s important to measure your ingredients accurately. Use a kitchen scale for the most accurate measurements, especially for flour. Too much flour can make your cookies dry and crumbly, while too little can result in cookies that spread too much.
- Don’t Overmix the Dough: Overmixing the dough can lead to tough cookies. Mix the ingredients until just combined, and avoid overworking the dough. This will help ensure that your cookies are tender and melt-in-your-mouth delicious.
- Chill the Dough: If you find that your dough is too soft to handle, try chilling it in the refrigerator for 15-30 minutes before shaping the cookies. This will make the dough easier to work with and help the cookies hold their shape during baking.
- Use Parchment Paper or a Silicone Baking Mat: Lining your baking sheet with parchment paper or a silicone baking mat will prevent the cookies from sticking and make cleanup a breeze. It also helps ensure even baking.
- Watch the Baking Time: Oven temperatures can vary, so keep a close eye on your cookies as they bake. They should be lightly golden around the edges but still soft in the center. Overbaking can result in dry, crumbly cookies, so it’s better to err on the side of underbaking.
- Cool Completely: Allow the cookies to cool on the baking sheet for a few minutes before transferring them to a wire rack to cool completely. This will help them set and prevent them from breaking apart.
By following these tips, you’ll be well on your way to baking the perfect batch of Easter Bunny Button Cookies. Whether you’re a seasoned baker or a novice in the kitchen, these tips will help you achieve delicious, picture-perfect cookies every time.
Creative Ways to Serve and Gift Easter Bunny Button Cookies
Easter Bunny Button Cookies are not only delicious but also incredibly versatile. Here are some creative ways to serve and gift these delightful cookies:
- Easter Dessert Platter: Arrange the cookies on a festive Easter platter alongside other treats like chocolate eggs, marshmallow chicks, and fruit. Add some fresh flowers or Easter decorations to create a stunning centerpiece for your Easter table.
- Cookie Bouquet: Create a cookie bouquet by attaching the cookies to wooden skewers and arranging them in a vase filled with Easter grass. This makes for a unique and eye-catching gift that’s sure to impress.
- Easter Gift Baskets: Pack the cookies in a decorative Easter basket along with other goodies like chocolate bunnies, jelly beans, and a small stuffed animal. Tie a ribbon around the basket for a festive touch.
- Cookie Jars: Layer the cookies in a clear glass jar and tie a ribbon around the lid. Add a personalized tag with a message like “Happy Easter” or “Some Bunny Loves You” for a thoughtful homemade gift.
- Easter Egg Hunt Surprise: Use the cookies as part of an Easter egg hunt by hiding them in plastic eggs or placing them in small treat bags. Kids will love discovering these sweet surprises as they search for eggs.
- Party Favors: Package the cookies in small cellophane bags and tie them with a ribbon to create adorable party favors for an Easter celebration. Add a personalized tag with the guest’s name for an extra special touch.
- Cookie Decorating Station: Set up a cookie decorating station at your Easter gathering and let guests customize their own Easter Bunny Button Cookies. Provide a variety of candies, sprinkles, and icing for endless creative possibilities.
- Easter Brunch Addition: Serve the cookies as part of an Easter brunch spread. Pair them with other brunch favorites like quiche, fruit salad, and mimosas for a delightful meal.
Nutritional Information
If you’re curious about the nutritional content of these cookies, here’s a breakdown per serving (1 cookie):
- Calories: 88kcal
- Carbohydrates: 11g
- Protein: 1g
- Fat: 5g
- Saturated Fat: 3g
- Cholesterol: 18mg
- Sodium: 36mg
- Potassium: 8mg
- Fiber: 1g
- Sugar: 6g
- Vitamin A: 133IU
- Calcium: 5mg
- Iron: 1mg
Variations to Try
While the classic Easter Bunny Button Cookies are a hit, you can always experiment with different flavors and ingredients to make them your own. Here are a few ideas:
- Chocolate Dough: Add 1/4 cup of cocoa powder to the dough for a chocolatey twist.
- Different Candies: Swap out M&Ms for other candies like Skittles, Reese’s Pieces, or jelly beans.
- Gluten-Free Option: Use a gluten-free flour blend to make these cookies suitable for those with dietary restrictions.
- Lemon or Almond Flavor: Add a teaspoon of lemon zest or almond extract for a refreshing flavor.
Why These Cookies Are Perfect for Easter
Easter is all about joy, renewal, and sweet surprises, and Easter Bunny Button Cookies embody all of that. Their miniature size makes them perfect for Easter egg hunts, dessert tables, or even as place settings at your Easter brunch. Plus, their pastel colors and cute design make them a hit with both kids and adults alike.
Easter Bunny Button Cookies: A Delightful Easter Treat
Advertisement

Easter Bunny Button Cookies are delightful, bite-sized treats perfect for Easter celebrations. These miniature cookies feature pastel candy centers, making them a festive addition to any Easter basket or dessert table. They are easy to make and can be a fun activity for the whole family. Plus, they make a great gift for friends and loved ones!
- Prep Time: 15 mins
- Cook Time: 10 mins
- Total Time: 25 mins
Ingredients
- 1 cup butter, softened
- 2/3 cup sugar
- 2 large egg yolks
- 1 teaspoon vanilla extract
- 2 1/3 cups all-purpose flour
- 1/2 cup sanding sugar
- 1/2 cup chocolate M&M candy
Instructions
- Preheat Oven: Preheat your oven to 350°F (175°C). Line a baking sheet with parchment paper or a silicone baking mat and set aside.
- Mix Butter and Sugar: In a mixing bowl, use a hand-held mixer to beat together the softened butter and sugar until light and fluffy.
- Add Egg Yolks and Vanilla: Add in the egg yolks and vanilla extract. Beat to combine.
- Incorporate Flour: Add the flour and mix into the butter mixture until just combined. Be careful not to overmix.
- Form Cookie Balls: Portion the dough into one-teaspoon amounts and roll into balls. Roll each ball in the sanding sugar and place on the prepared baking sheet.
- Add Candy Centers: Push an M&M candy into the center of each cookie.
- Bake: Bake for 10 minutes. Remove from the oven and allow the cookies to cool on the baking sheet for 3-5 minutes. Then transfer the cookies to a wire cooling rack to finish cooling.
Notes
- Butter Consistency: Ensure the butter is softened but not melted for the best texture.
- Sanding Sugar: Use pastel-colored sanding sugar for a more festive look.
- Candy Centers: Feel free to use other small candies like jelly beans or pastel-colored chocolate chips if M&Ms aren’t available.
- Storage: Store cookies in an airtight container to keep them fresh.
Nutrition
- Calories: 88kcal
- Sugar: 6g
- Fat: 5g
- Saturated Fat: 3g
- Carbohydrates: 11g
- Fiber: 1g
- Protein: 1g
- Cholesterol: 18mg
Final Thoughts
Easter Bunny Button Cookies are more than just a recipe—they’re a celebration of the Easter season. With their simple ingredients, easy preparation, and delightful presentation, they’re sure to become a staple in your Easter traditions. Whether you’re baking them for a party, as a gift, or just to enjoy with your family, these cookies are guaranteed to bring smiles all around.